In this article, you will say ‘Hello’ to Groovy. We will see the installation and ‘the’ most important “Hello World!” program. 🙂
Apache Groovy is a powerful, optionally typed, and dynamic language. It integrates smoothly with any Java program.
How To Install Groovy?
There are many ways you can download and Install Groovy.
On this day, Groovy 3.0 is the latest stable version of Groovy designed for JDK8+.
Currently, I am using Windows so we will be using a Windows installer, which is a community artifact.
Here is a link for Windows Installer for Groovy 3.0.7.
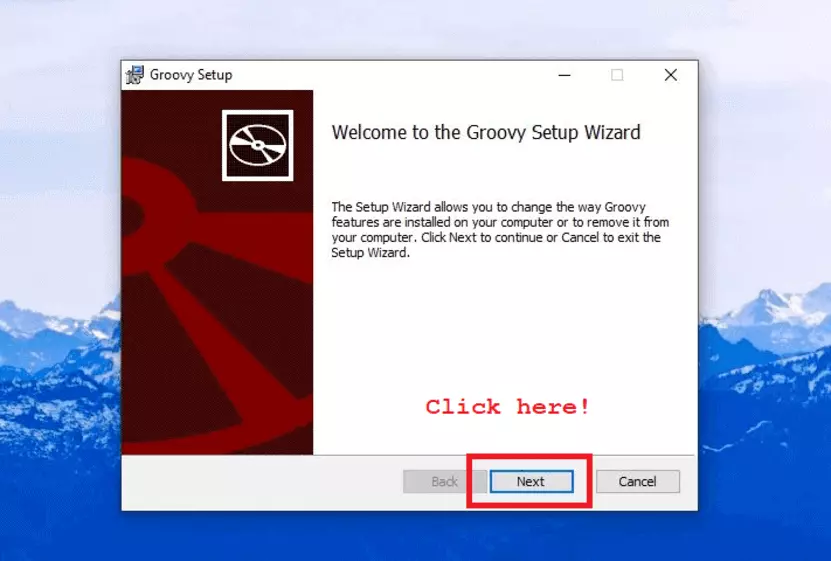
Once you download the .msi file ( i.e. installer) simply double-click on it and you will see the installation screen.

The installation is pretty simple and straightforward. Click on Next and go with the default setting.
Note: If you are using Mac OS and you have Homebrew, you can install Groovy by the following command.
brew install groovy
Refer to the official installation guide for more information.
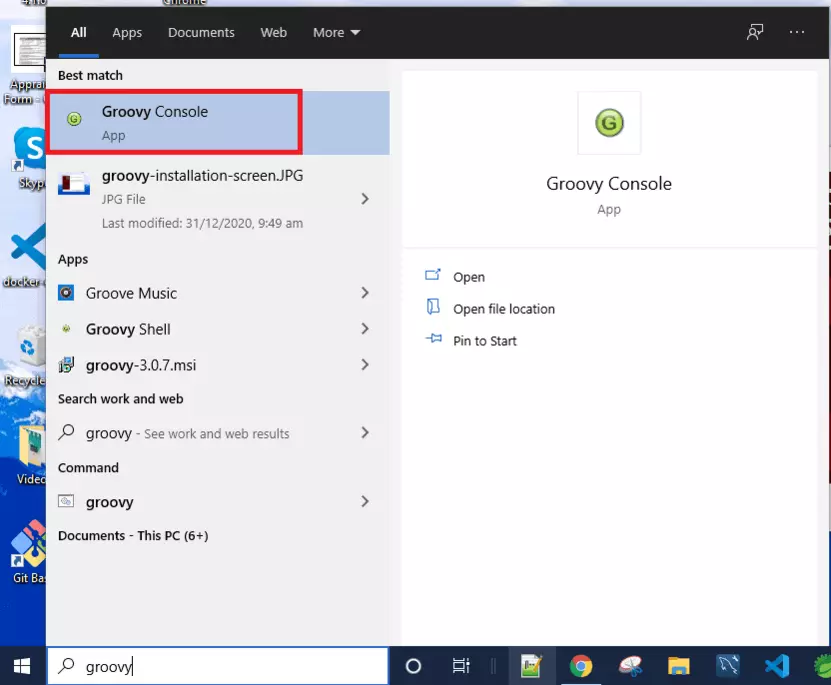
Once you are done with the installation, you can search for the Groovy Console from your start menu. And finally, you are ready to write your first “Hello World!” program.

Hello World In Groovy
Groovy is a JVM-based language. If you have used Java before you know how we create a class, then method and write our print statement in it.
Things are pretty much different here.
You can simply write the print statement with your “Hello World!” string and it will get printed on the console.
So let’s try.
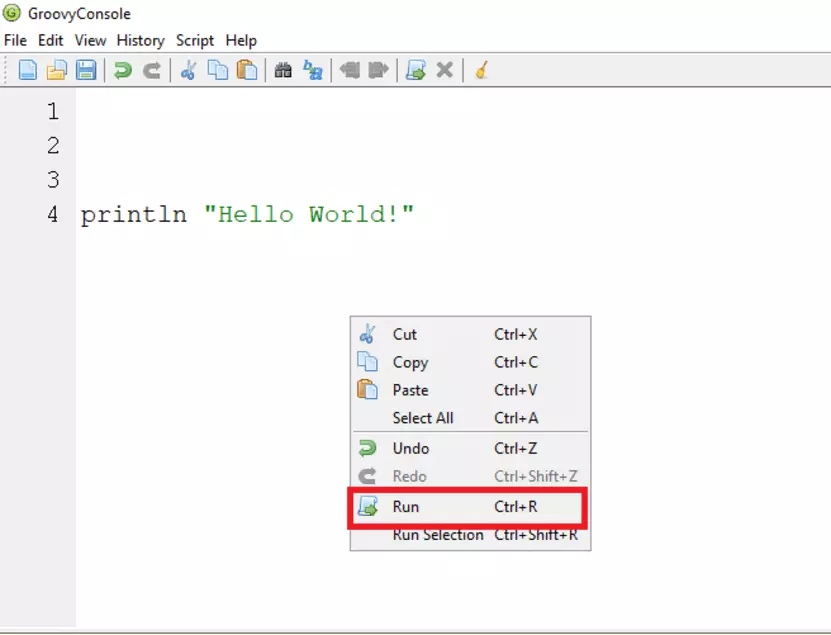
Open your Groovy Console. Add the following statement to it.
println "Hello World!"

To run your program right-click on the console and choose the ‘Run’ option.
You can also use the shortcut Ctrl+R to run any Groovy program.
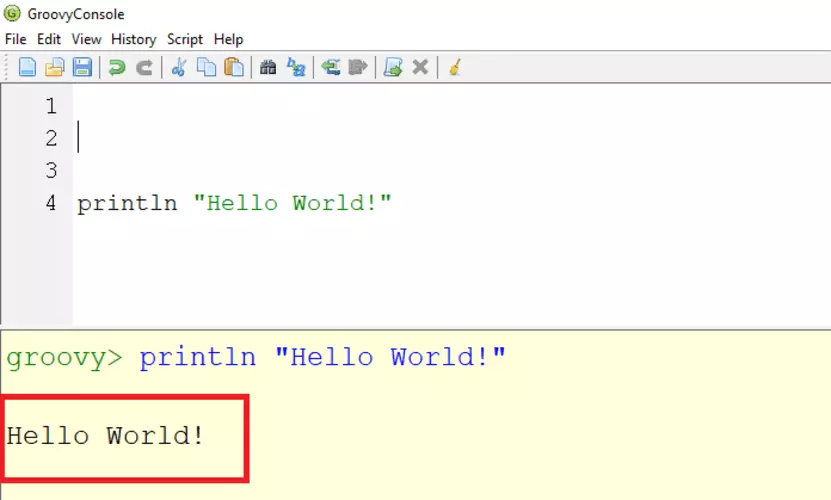
Boom!! 🎉
You can see the string “Hello World!” is printed on the console.

So you have successfully written your first groovy program.
That’s it for now.
You can visit my YouTube channel ‘coderolls’ to find more video tutorials.