How To Create A Maven Project In Eclipse?
In this short tutorial, we will see how to create a maven project in Eclipse.
Introduction
Maven is the most popular build automation tool used to create and manage Java projects.
Maven helps developers to save time by:
- Making the build process easy
- Providing a uniform build system
- Providing quality project information
- Encouraging better development practices
The Eclipse IDE is the most popular IDE for Java. It provides support for the Maven build.
So, let’s check the following step-by-step guide on how to create a maven project in Eclipse.
How To Create Maven Project In Eclipse?
To create a simple maven project in the eclipse, kindly follow the below steps:
#Step 1:
Open eclipse.
If you are opening the eclipse for the first time in a workspace, you will see a ‘Welcome’ tab, kindly close it.
Then click on File>New>Project.
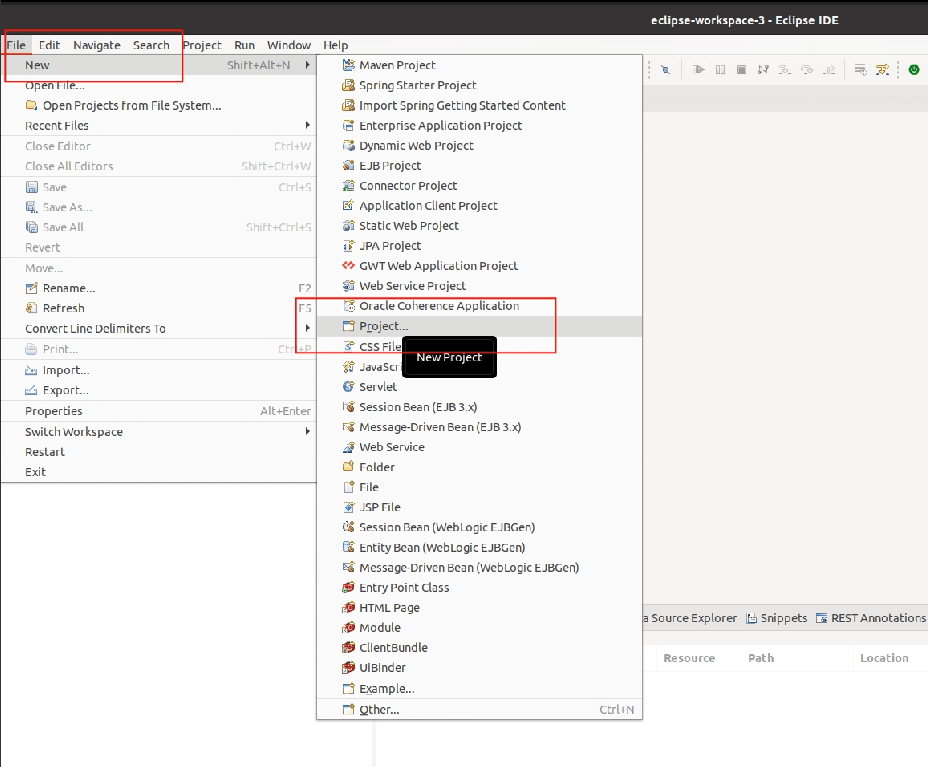
When you click on the ‘project’ option you will see the ‘New Project’ wizard.
#Step 2:
Search ‘maven’ using the search bar given under ‘Wizards’ and select the ‘Maven Project’ option.
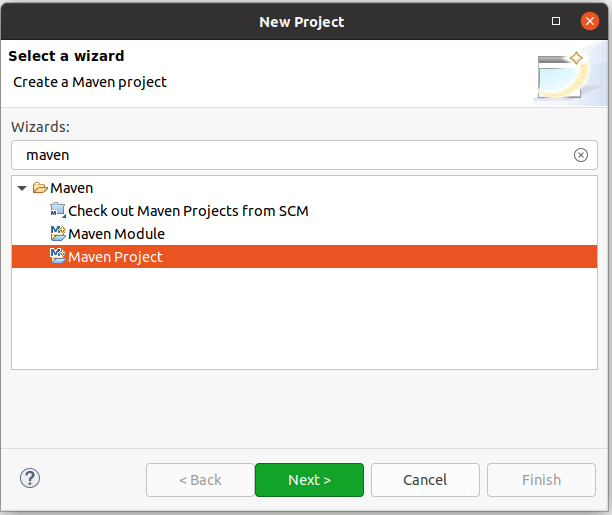
When you click the ‘Next’ button on the ‘New Project’ window, you will see the ‘New Maven Project’ window.
#Step 3:
In #Step 3, we will keep the default workspace checkbox marked. It will select the default workspace as the project workspace.
If you want to use any specific workspace, please uncheck the default workspace checkbox and browse the location of your workspace.
This window also provides the facility to add your project to the existing ‘Working Set’. Since we do not have any working set yet, we will keep it as it is. Then click on the ‘next’ button.
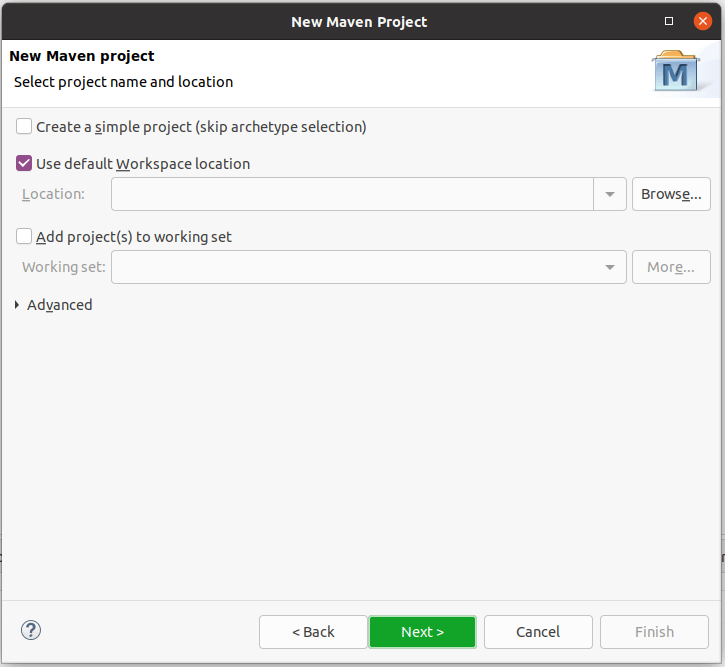
The first checkbox is for simple maven project creation. If you check this checkbox, it will skip the maven archetype selection and create a simple maven project for you.
To explain the archetype selection in the maven project, I am keeping it unchecked.
#Step 4:
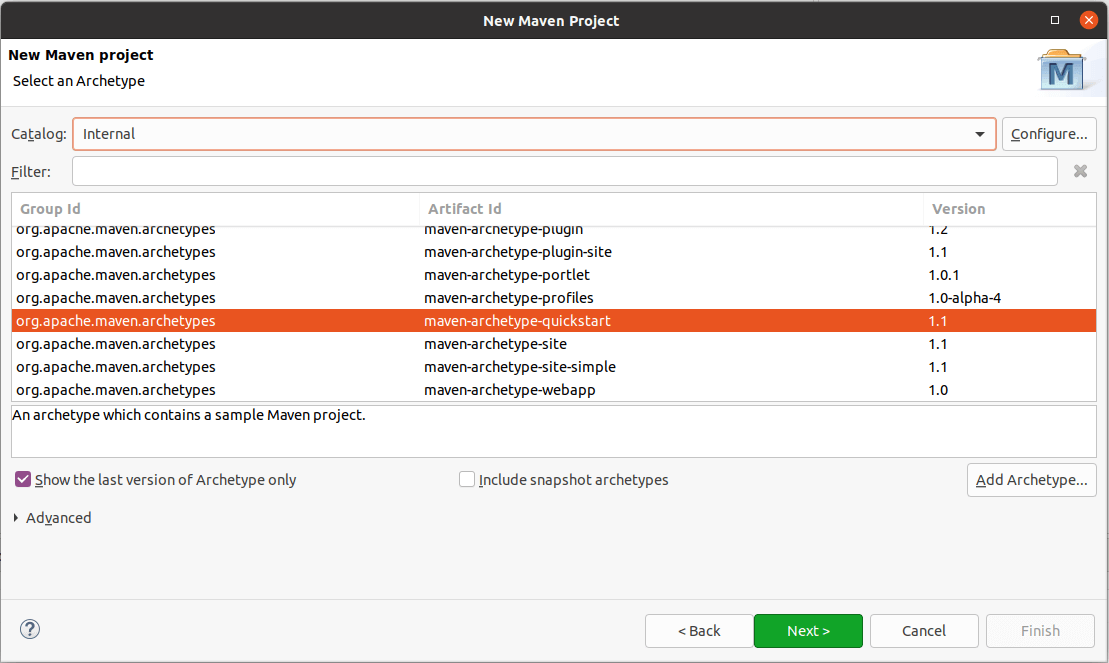
Here we need to select an archetype for the maven project.
Select the ‘Catalog’ as ‘Internal’. And select the archetype as ‘maven-archetype-quickstart’.
#Step 5:
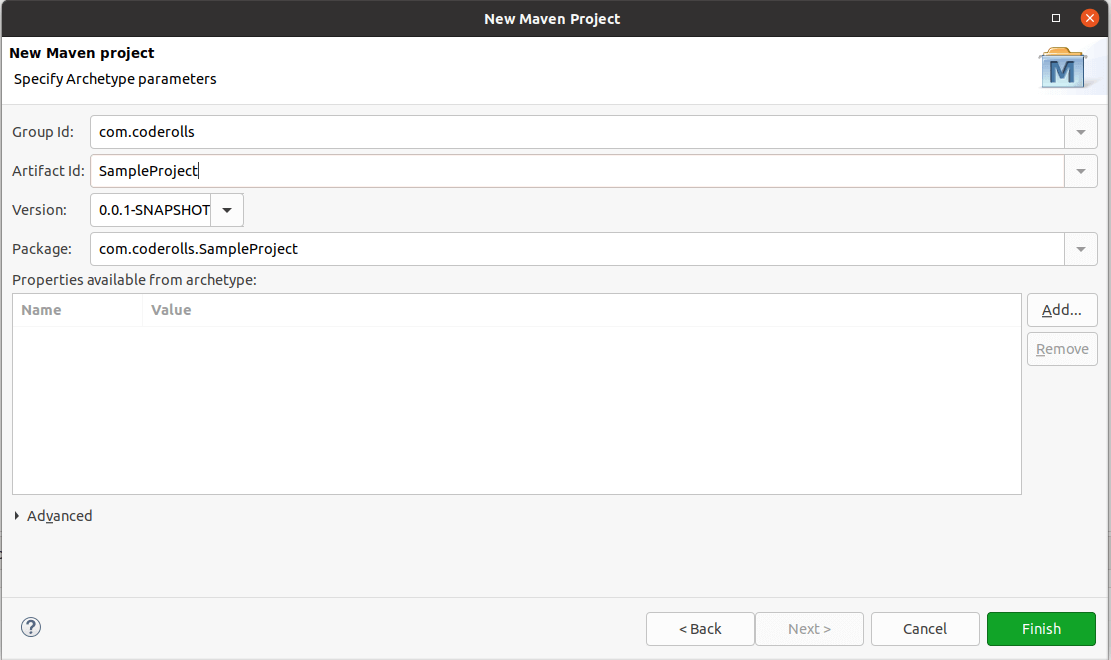
In the next part of the ‘New Maven Project’ window, we need to select the ‘Group Id’ and ‘Artifact Id’
‘Group Id’: A Group ID is a unique base name of the company or group that created the project.
‘Artifact Id’: Artifact Id is a unique name of the project.
I have entered the Group id as ‘com.coderolls’ and the Artifact id as ‘SampleProject’. We will keep the ‘Version’ value as given there.
Now you can click on the ‘Finish’ button and Eclipse will create and build the project for you.
You can see the project structure of your maven project below.
The src/main/java contains the source code and src/test/java contains your unit test cases.
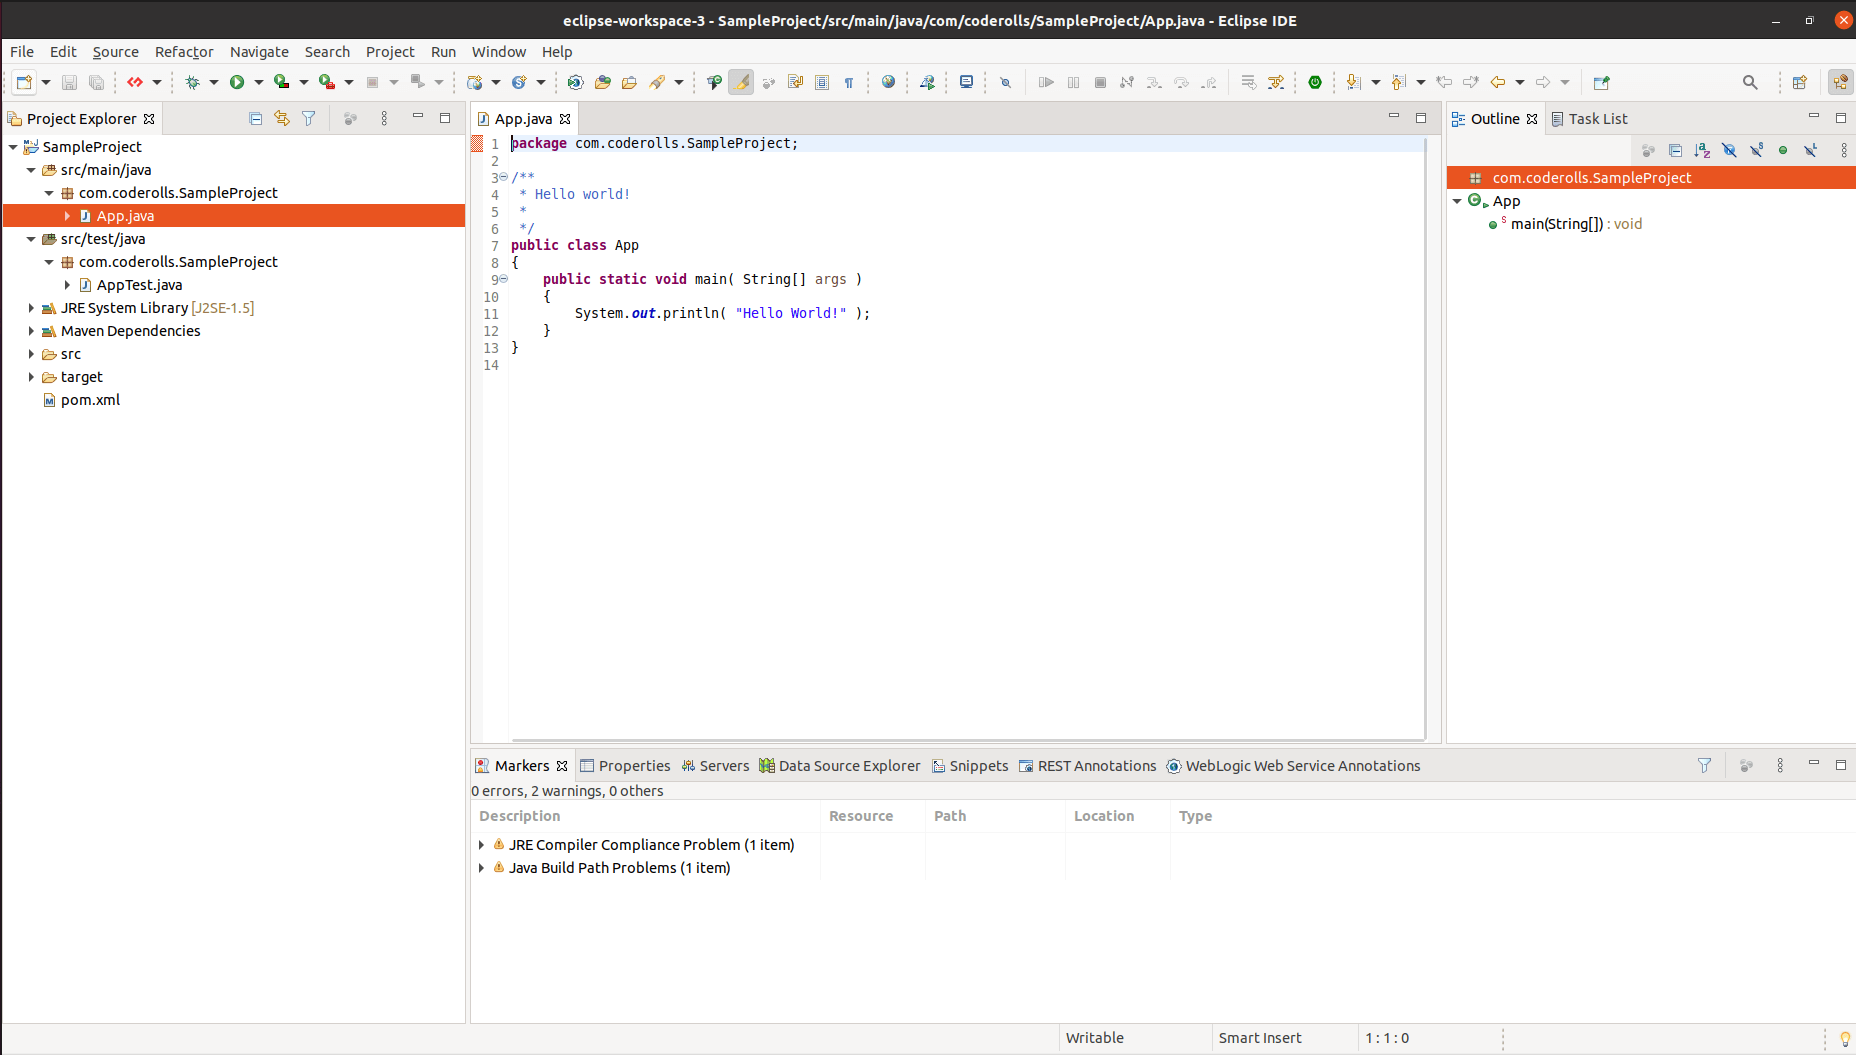
In Maven projects, you can manage your dependencies using the pom.xml file.
The pom.xml at the beginning looks like the one given below.
<project xmlns="http://maven.apache.org/POM/4.0.0" xmlns:xsi="http://www.w3.org/2001/XMLSchema-instance"
  xsi:schemaLocation="http://maven.apache.org/POM/4.0.0 http://maven.apache.org/xsd/maven-4.0.0.xsd">
  <modelVersion>4.0.0</modelVersion>

  <groupId>com.coderolls</groupId>
  <artifactId>SampleProject</artifactId>
  <version>0.0.1-SNAPSHOT</version>
  <packaging>jar</packaging>

  <name>SampleProject</name>
  <url>http://maven.apache.org</url>

  <properties>
    <project.build.sourceEncoding>UTF-8</project.build.sourceEncoding>
  </properties>

  <dependencies>
    <dependency>
      <groupId>junit</groupId>
      <artifactId>junit</artifactId>
      <version>3.8.1</version>
      <scope>test</scope>
    </dependency>
  </dependencies>
</project>
This is how you have created your simple maven project step by step in Eclipse IDE.