How To Write JUnit Test Case In Java? (With Example)
In this article, we will be introduced to JUnit - Unit Testing Framework in Java. Also, We will see How To Write a JUnit Test Case. So, you will be writing your First JUnit Test case.
Introduction
JUnit is an open-source Unit Testing Framework for the Java programming language.
JUnit framework helps developers to test their code on its own.
How to write a JUnit Test case in Java?
To write the first JUnit Test case we will take a sample method generatePassword() and check if it is generating the password as expected.
Step 1: Creating A Maven Project
First, we need to create a maven project. You can refer to the article How To Create A Maven Project In Eclipse? The maven project helps us organize the source code and test code separately.
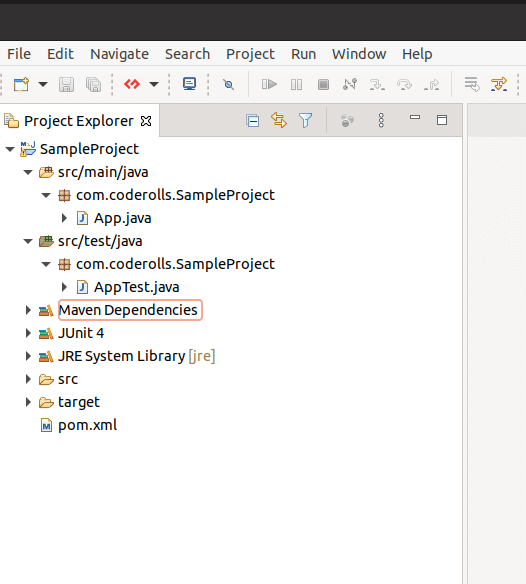
You will be able to see the project structure as shown below
Step 2: Creating A Class that needs to be tested
Since this is a tutorial we are creating this class so that we can use it for testing.
Then we will create a sample class PasswordGenerator.java with a method generatePassword() as below.
Please take note that here PasswordGenerator.java class is our System Under Test and we will be writing a unit test case to test the generatePassword() method.
package com.coderolls.SampleProject;

public class PasswordGenerator {
	/**
	 * A method generates a password from name and year of birth
	 *
	 * Ex. For the name 'Thomas' and Year of birth '1992', it will generate the password as 'Thom1992'.
	 *
	 * If the name is equal to or less than 4 characters then it will return name+YearOfith as password.
	 *
	 * Ex. For name 'Mary' and year of birth '2003', it will return 'Mary2003' as password.
	 *
	 * @param name
	 * @param yearOfBirth
	 * @return
	 */
  public String generatePassword(String name, int yearOfBirth) {
    String password = null;

    if(name.length()<=4) {
      password = name+yearOfBirth;
    }else {
      String str = name.substring(0, 4);
      password =str+yearOfBirth;
    }
    return password;
  }
}
In the above class. the method generatePassword() will generate a password from name and year of birth.
Ex. For the name ‘Thomas’ and the Year of birth ‘1992’, it will generate the password as ‘Thom1992’.
If the name has equal to or less than 4 characters then it will return name+YearOfith as the password.
Ex. For the name ‘Mary’ and year of birth ‘2003’, it will return ‘Mary2003’ as the password. And for ‘Om’ and ‘2001’, it will return ‘Om2001’ as the password.
Step 3: Creating A JUnit Test Case
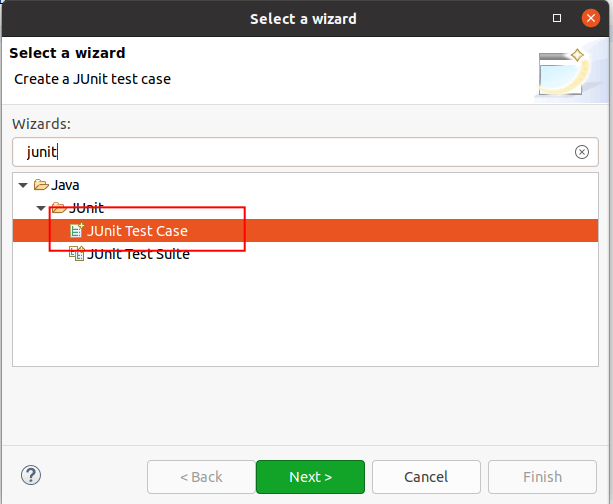
To create a JUnit test case, write click on the src/test/java and New>JUnit Test Case. You will see the screen as given below.
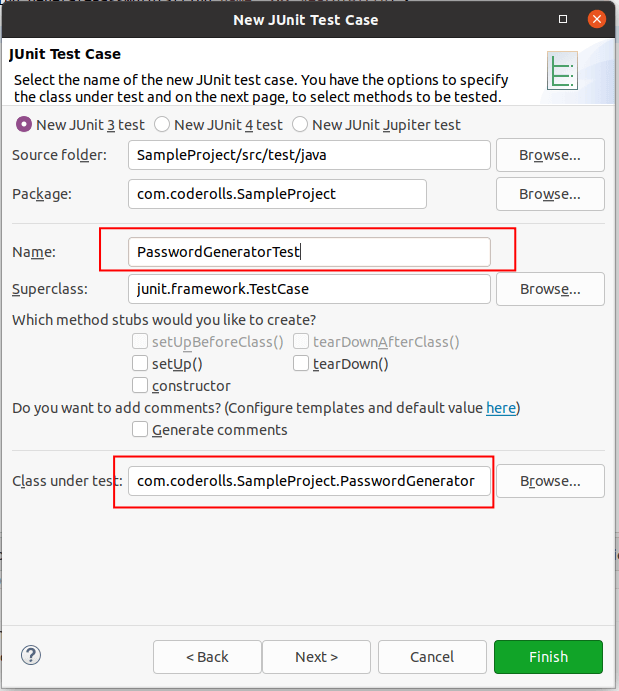
Enter the package for your JUnit test case. Make sure the package of the class that needs to be tested and the JUnit test case should be the same.
Junit test case name should be ClassName+”Test”, so in our case, the Junit test case name will be ‘PasswordGeneratorTest’.
Then browse the class that needs to be tested. Once all details are filled in properly click on finish.
Step 4: Writing First Junit Test Case method
Here we will be writing our first unit test case. We will be using the @Test annotation for our test case.
Since we will be testing the generatePassword() method our test method name will be testGenaratePassword(). It is a convention to add ‘test before the test method name + the name of the method that needs to be tested. And finally, we will adjust this name in camelCase.
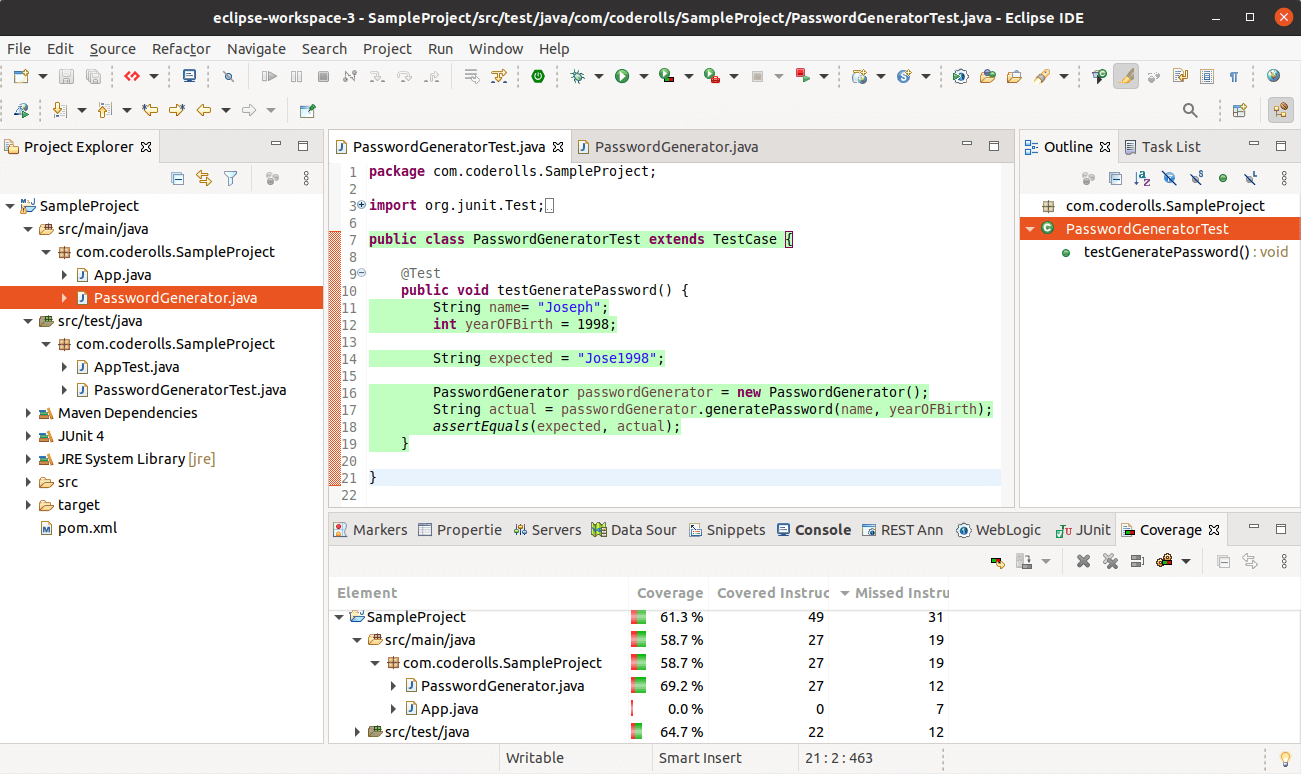
Our first unit test method will look like the one given below.
	@Test
  public void testGeneratePassword() {
    String name= "Joseph";
    int yearOFBirth = 1998;

    String expected = "Jose1998";

    PasswordGenerator passwordGenerator = new PasswordGenerator();
    String actual = passwordGenerator.generatePassword(name, yearOFBirth);

    assertEquals(expected, actual);
  }
In the above unit test case method, we have used the assertEquals(expected, actual) method of JUnit’s Assert class to test the generatePassword() method.
Here we are checking if the expected and actual results are the same or not.
Here, expected is the result that we expect from our method. In this case, we know the working of the generatePassword() method. We know that it will return the first 4 characters from the name with the year of birth.
So, we created our expected string manually and then we invoked the method generatePassword() by passing the same parameter (i.e. name and yearOfBirth) and storing the returned string in the actual string variable.
Once we have expected and actual, we can use the assertEquals(expected, actual) method to check if both strings are the same or not.
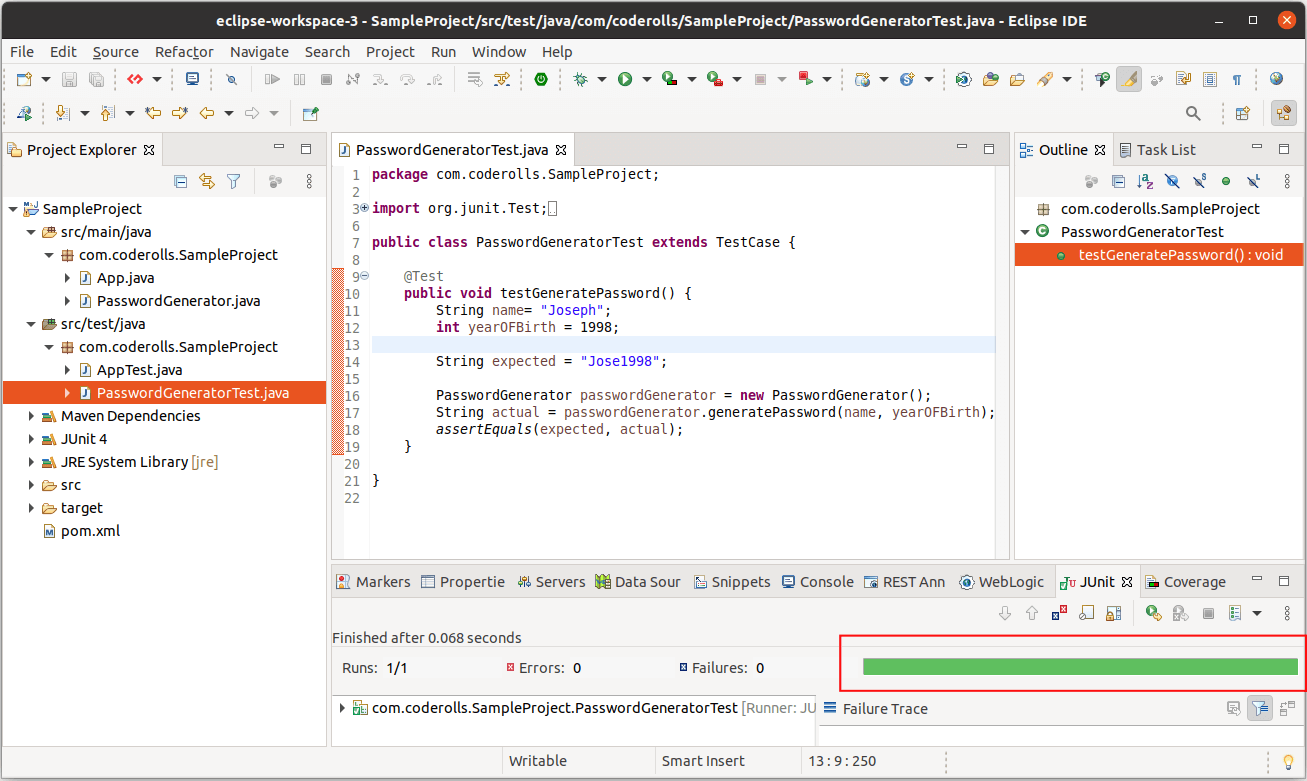
To run this unit test case, we can right-click and then select Run As > JUnit Test.
If the test passes, we can see the Green bar in the output console as shown below.
To check whether the code is covered by the unit test we can check the code coverage. To test the code coverage, right-click in the test case editor and select Coverage As>JUnit Test Case or the shortcut is alt+shift+E, T
We can check how many lines of the PasswordGenerator.java class are covered by the unit test case we have written till now.
In the below screenshot of PasswordGenerator.java, we can see
Green lines - Fully covered by the unit test case
Yellow Lines - Partially covered
For example. If it is an if statement, then only one case (branch) is covered. i.e either true or false
Red Line - Not covered yet
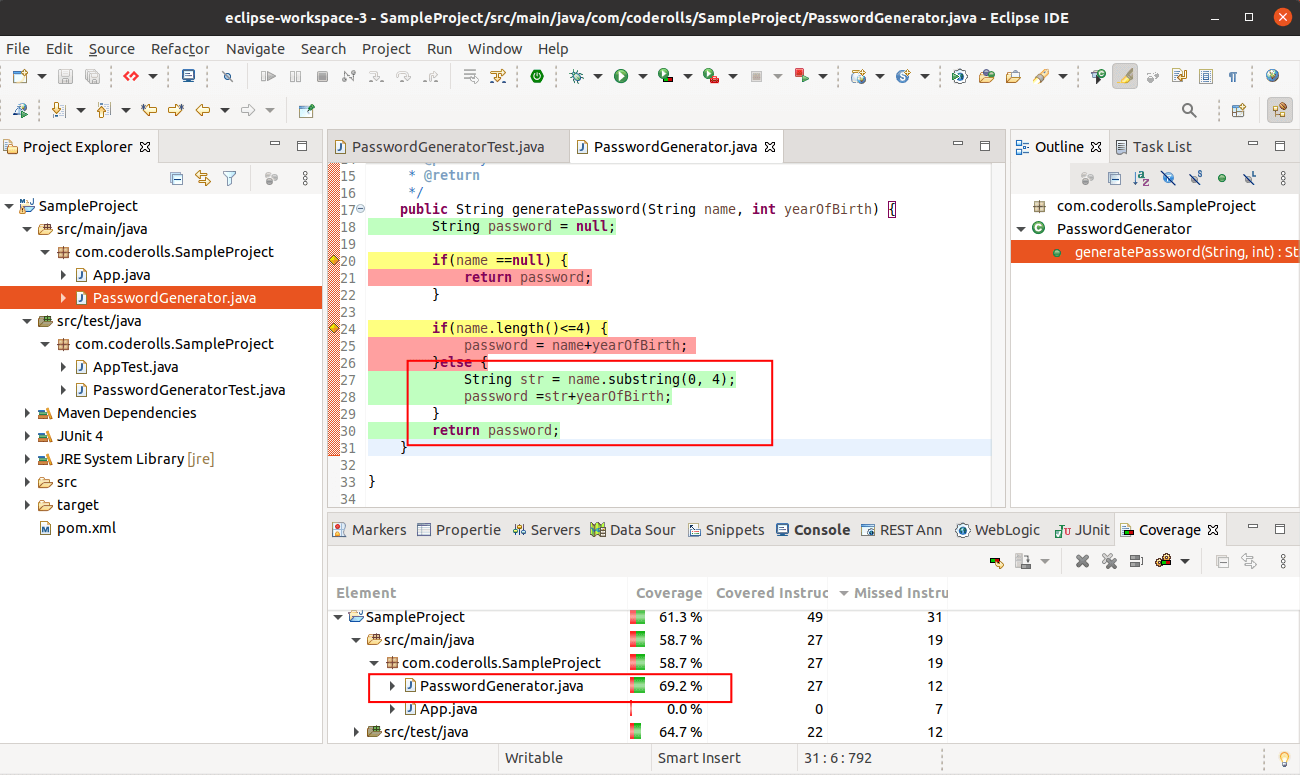
In eclipse, even the unit test code goes green if everything seems fine, otherwise, it will show in red if there are some errors in the test code.
As we can see in PasswordGenerator.java, the generatePassword() method else part is covered where we are creating a password with a name length of more than 4 characters.
Step 5 : Adding More Junit Test Case Methods
So, let’s add one more unit test method to test the condition where we can receive a name with a length of fewer than 4 characters.
Give this unit test method a specific name. Here we will continue with the testGeneratePassword and then we will write a specific condition we are going to test here.
So the complete name should be testGeneratePassword_nameLessThan4Charaters().
	@Test
	public void testGeneratePassword_nameLessThan4Charaters() {
		String name= "Nic";
		int yearOFBirth = 2002;

		String expected = "Nic2002";

		PasswordGenerator passwordGenerator = new PasswordGenerator();
		String actual = passwordGenerator.generatePassword(name, yearOFBirth);

		assertEquals(expected, actual);
	}
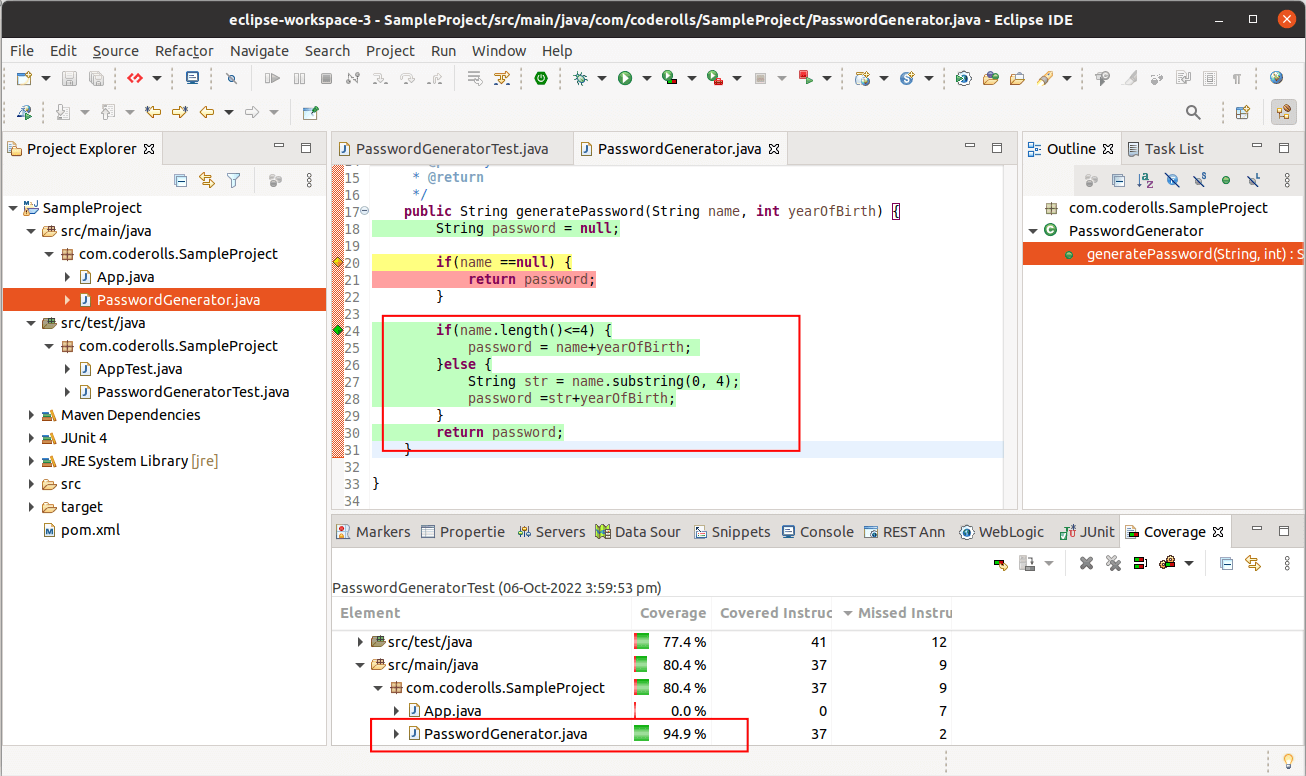
Now our PasswordGneratorTest unit test class has two unit test methods and we can see both are passed.
In PasswordGnerator.java we can see both if and else condition code is highlighted in green.
Also, in the beginning, we checked if the name was null or not. If it is null, we will return the password as null.
Currently, we have not covered it by writing any unit test case in the PasswordGneratorTest.java JUnit Test case.
We can check this with the assertNull() method of the Assert class.
	@Test
	public void testGeneratePassword_nameIsNull() {
		String name= null;
		int yearOFBirth = 2002;

		PasswordGenerator passwordGenerator = new PasswordGenerator();
		String actual = passwordGenerator.generatePassword(name, yearOFBirth);

		assertNull(actual);
	}
We can see all the code from PasswordGnerator.java is now Green i.e. covered. Also for PasswordGnerator.java, the code coverage percentage is showing 100% in the coverage window.
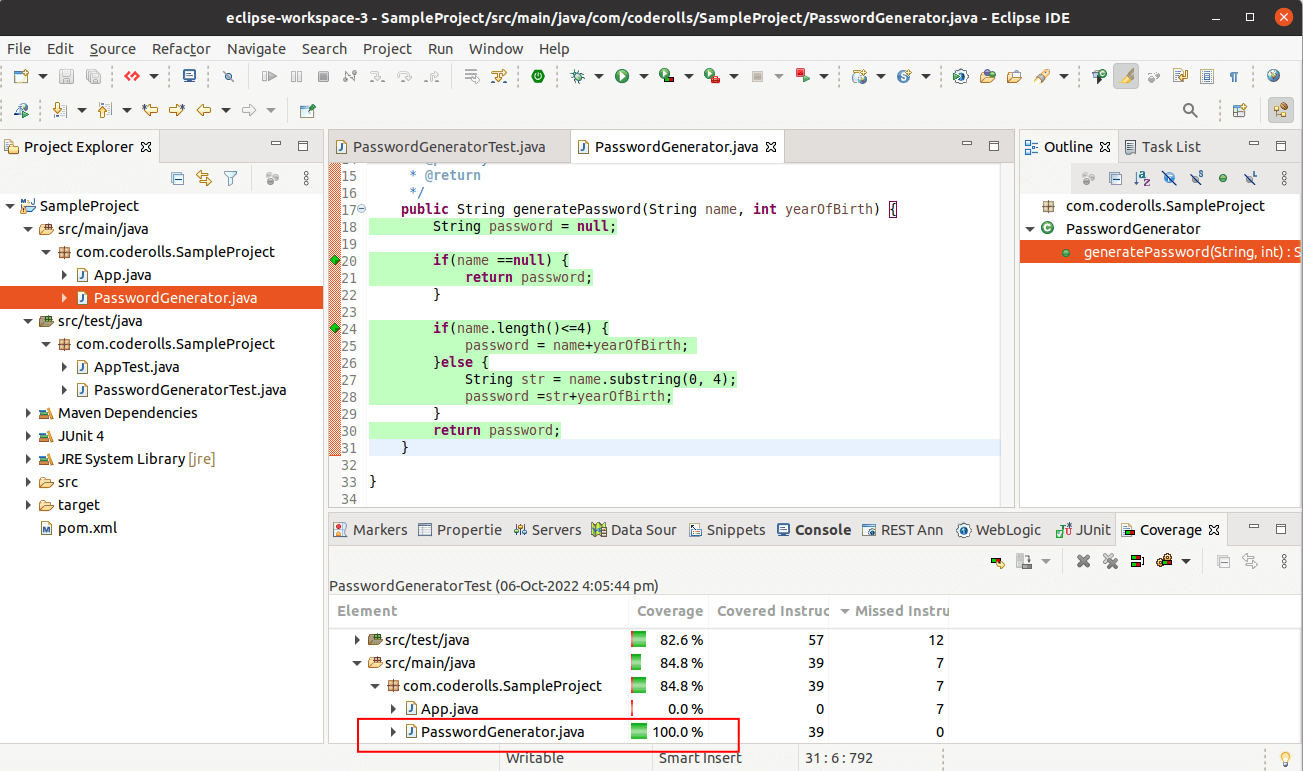
Also, our PasswordGneratorTest.java unit test class has three unit test methods and we can see all tests are passed.

This is how we have written our first unit test case using the JUnit - Unit Testing framework for Java Programming language.
Conclusion
We have written three unit test methods in the PasswordGneratorTest JUnit test case to test the generatePassword() method of the PasswordGenerator.java
We have used assertEquals(expected, actual) and assertNull(actual) methods of the Assert class.
In the first and second test methods, the test passes if the expected and actual results are the same.
assertEquals(expected, actual)
In the third test method test passes if the actual is null.
assertNull(actual)
The example Java programs used in the above article can be found at this GitHub repository, coderolls/junit-tutorial.
Please write your thoughts in the comment section below.